Follow Me On Social Media!

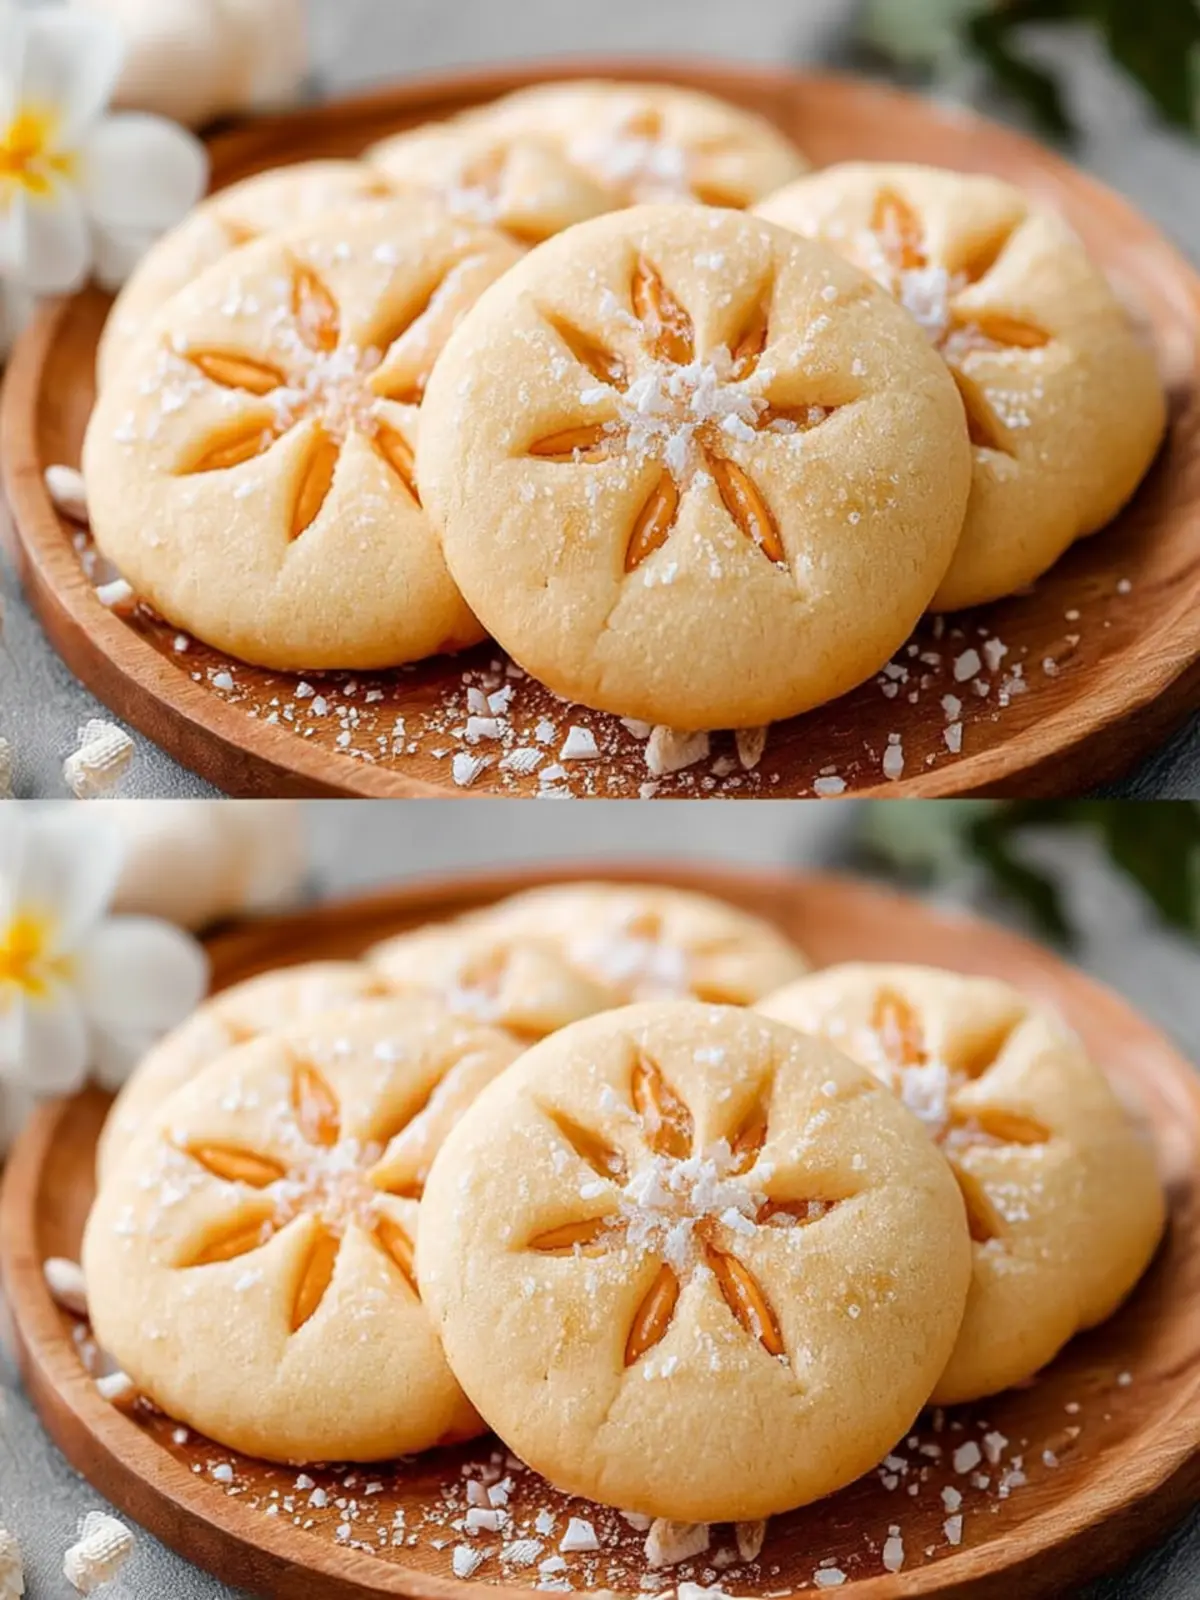
Sand Dollar Cookies: The Easy Classic Recipe You’ll Love
Introduction to Sand Dollar Cookies: An Easy Classic Recipe
Baking sand dollar cookies isn’t just about enjoying a sweet treat; it embodies a heartfelt tradition passed down through generations. These delightful cookies, resembling tiny beach treasures, often remind us of summer vacations spent on warm sandy shores. The gentle crunch of each bite paired with a sprinkle of sugar captures the spirit of coastal adventures, making them a beloved addition to any gathering. Whether you’re sharing them with family or bringing them to a potluck, each cookie holds a story waiting to be told.
As you embark on your cookie-making journey, remember that sand dollar cookies allow for creativity along with nostalgia. Try pairing them with a cup of tea or a scoop of ice cream for a delightful dessert experience. Surprisingly, they are not only simple to make but also call for ingredients that you may already have in your pantry.
Why Baking Sand Dollar Cookies is a Heartfelt Tradition
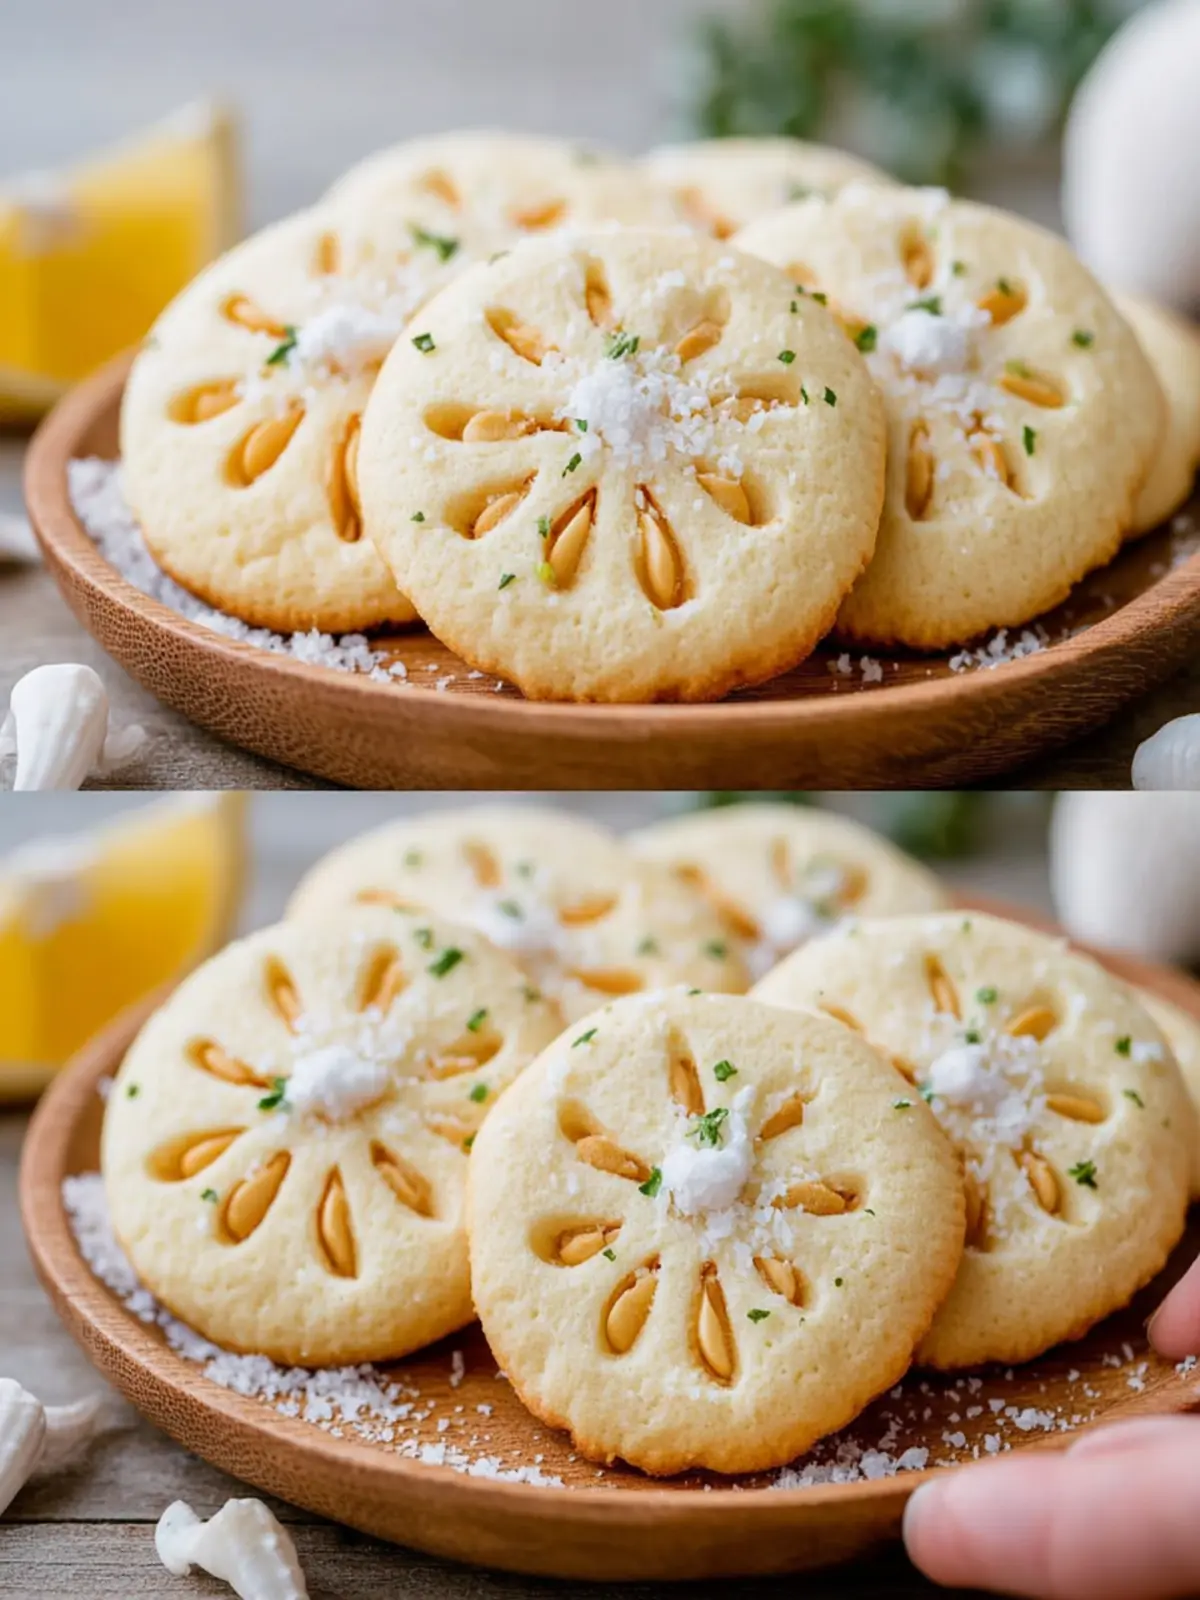
Sand dollar cookies have a special place in many households, often signaling the arrival of winter holidays or summertime bonding moments. Traditionally shaped to mimic the actual sand dollars found on the beach, they can evoke memories of seaside strolls and family gatherings. Baking these cookies provides a sense of connectedness, reminding us to slow down and enjoy the simple things in life.
Moreover, these delightful treats can be easily personalized. Whether you choose to enhance them with lemon zest for a fresh twist or dust them with powdered sugar for a snowy effect, the versatility of sand dollar cookies allows for endless variations. Each batch brings a chance to create new memories, whether shared among family or gifted to friends.
So, as you prepare to roll out your sand dollar cookies, think about the stories you want to share and the moments you want to create. This recipe is not just about the cookies; it’s about the love and laughter that come with each homemade batch. Let’s dive into the ingredients that make these cookies a classic favorite!

Key Ingredients for Sand Dollar Cookies
Creating delightful sand dollar cookies is all about choosing the right ingredients that evoke the spirit of the beach and family gatherings. Each component plays an essential role in bringing these whimsical treats to life.
-
All-Purpose Flour: This is the backbone of our cookies. I always opt for high-quality all-purpose flour to ensure a tender, yet sturdy cookie that can hold that signature sand dollar shape.
-
Unsalted Butter: Using room temperature unsalted butter is key for achieving that rich flavor and perfect texture. It creaminess blends beautifully with the sugars for a soft, melt-in-your-mouth experience.
-
Granulated Sugar and Powdered Sugar: A combination of both sugars gives the cookies a lovely balance of sweetness and a subtle, crumbly texture. The granulated sugar helps create a delicate crunch while the powdered sugar adds that soft finish.
-
Vanilla Extract: Don’t skimp on this! Pure vanilla extract enhances the flavor, making every bite more aromatic and delicious.
-
Eggs: One egg is essential for binding the dough, ensuring that each cookie holds together perfectly.
-
Salt: A pinch of salt is crucial; it enhances all the flavors and helps balance the sweetness.
These ingredients come together in harmony, letting you enjoy a batch of sand dollar cookies that not only look exquisite but taste heavenly too!
Why You’ll Love This Recipe
Sand dollar cookies have a special place in my heart, reminiscent of lazy beach days and warm summer evenings spent with family. These delightful treats are not only easy to make but also bring a sense of nostalgia and joy that’s hard to match. Picture this: you return home after a long day and the aroma of freshly baked cookies wafts through your kitchen. Instant comfort, right?
Here’s what makes this recipe truly shine:
Simple Ingredients You’ll Love
- Flour: The backbone of your sand dollar cookies, giving them structure and a pleasing texture.
- Butter: A must-have for richness and flavor; it melts beautifully, creating a tender cookie.
- Sugar: For sweetness that balances the butter, I use a blend of granulated sugar and a touch of powdered sugar for that melt-in-your-mouth quality.
- Eggs: Just one egg adds moisture, while helping create a perfect rise that makes these cookies just right.
- Vanilla Extract: This enhances the flavor profile, adding a warm and inviting note that makes you come back for more.
Quick and Easy Preparation
Not only are these sand dollar cookies simple to whip up, but they also come together in a matter of minutes. This means more time to enjoy life and share these delicious bites with friends and family.
So why wait? Dive into making these cookies, and you might just find a new favorite dessert that brightens your day!
Variations of Sand Dollar Cookies
Nut Alternatives
To customize your sand dollar cookies, explore different types of nuts to find your perfect match. While walnuts and pecans are classic choices for their rich and buttery flavors, almond or hazelnut meal can add a subtle sweetness and unique character. If you’re looking to create a nut-free version, consider using seeds like sunflower or pumpkin seeds. They offer a delightful crunch without compromising texture or taste. Remember to chop nuts finely for even distribution throughout the dough, ensuring every bite is packed with flavor!
Flavor Twists
When it comes to flavoring your sand dollar cookies, the possibilities are nearly endless! Experimenting with different extracts can transform your traditional recipe into something extraordinary. A splash of almond extract can elevate the cookies with a marzipan-like touch, while a hint of citrus, like lemon or orange zest, adds a refreshing brightness. If you crave a warming spice, a dash of cinnamon or nutmeg can create a comforting seasonal treat. For a chocolate lover’s twist, incorporate cocoa powder or chocolate chips into the dough. These small adjustments can make your cookies a unique delight. Whether it’s the nutty base or the innovative flavors, each variation tells its own delicious story.
Cooking Tips and Notes for Perfect Sand Dollar Cookies
Mixing Techniques
When crafting sand dollar cookies, the way you mix the ingredients can greatly influence the texture and flavor. Start by creaming the butter and sugar together until the mixture is light and fluffy—this incorporates air, making your cookies wonderfully tender. Once that’s done, gradually mix in the eggs and vanilla extract. Avoid overmixing once the flour is added; gently fold until just combined. This ensures a delicate cookie consistency. A tip I find helpful is to chill your dough for at least 30 minutes before baking. It not only makes the dough easier to handle but also helps the cookies maintain their shape in the oven.
Baking Time and Temperature Adjustments
Baking sand dollar cookies might seem straightforward, but even small changes can make a big difference. Typically, baking at 350°F is perfect for a lightly golden finish. If you prefer a chewier cookie, reduce the temperature to 325°F and extend the baking time by a few minutes. Similarly, if you live in a high-altitude area, consider decreasing the baking time slightly to prevent over-baking, as cookies tend to dry out faster. Remember, every oven is unique, so keep an eye on the edges; once they start to turn just golden, it’s time to pull them out and let them cool on the baking sheet for a few minutes before transferring them to a wire rack. Happy baking!

Serving Suggestions for Sand Dollar Cookies
Sand dollar cookies not only make your dessert table charming but also serve as a delightful treat that evokes memories of sun-kissed beaches. To enhance your experience with these delightful cookies, consider the following serving suggestions that beautifully complement their buttery texture and subtle sweetness.
Pairing with Beverages
The crisp, sandy texture of sand dollar cookies pairs wonderfully with a variety of beverages. Here are a few favorites:
- Coffee: A rich cup of coffee, whether it’s a classic black brew or a creamy latte, contrasts beautifully with the cookies’ sweetness.
- Tea: Herbal teas, especially chamomile or peppermint, add a calming touch, perfect for an afternoon snack.
- Milk: The classic choice! A cold glass of milk is always a crowd-pleaser, making each bite even more enjoyable.
Ideal Occasions
Think about occasions where sand dollar cookies can shine:
- Beach Parties: They’re the perfect sweet treat for a seaside gathering, bringing a bit of the beach vibe to your picnic.
- Holiday Cookie Platters: Add them to your holiday cookie tray; their unique shape will make them a standout item.
- Casual Get-Togethers: Whether it’s a movie night with friends or a cozy gathering at home, these cookies are sure to be a hit.
With these suggestions, you’re ready to serve sand dollar cookies in a way that brings joy to any occasion!
Time Breakdown for Sand Dollar Cookies
Creating delightful sand dollar cookies is not just about the finished product; it’s about enjoying the process. When you carve out time for baking, the results are always worth it. Here’s how the time unfolds for this easy classic recipe:
Preparation Time
The initial preparation will take about 15 minutes. This includes gathering your ingredients and mixing everything together to form a dough that’s ready to chill.
Baking Time
Once your dough is chilled, the baking will only require about 10-12 minutes. Each batch of these cookies turns golden brown in no time, filling your kitchen with a warm, inviting aroma.
Total Time
In total, you’re looking at about 30-35 minutes from start to finish. Just imagine, in a little over half an hour, you’ll have a delightful tray of sand dollar cookies to share with friends or enjoy with a warm cup of coffee!
Nutritional Facts for Sand Dollar Cookies
When indulging in sand dollar cookies, it’s essential to understand their nutritional profile. Each cookie not only delights your taste buds but also carries specific nutritional values that can fit well into your lifestyle.
Calories Per Cookie
Each delightful sand dollar cookie contains approximately 100 calories. This makes them a great option for a sweet treat without going overboard, allowing you to enjoy that homemade goodness guilt-free.
Sugar Content
In terms of sweetness, a single sand dollar cookie has about 6 grams of sugar. While it offers that satisfying sweetness characteristic of cookies, it’s a manageable amount if you’re looking to enjoy your dessert mindfully.
By keeping these nutritional facts in mind, you can savor every bite while staying aware of your dietary choices.
FAQs About Sand Dollar Cookies
Creating sand dollar cookies is a delightful experience, and it’s natural to have questions about perfecting them. Below, we’ve gathered some common inquiries to help you make the most of this delicious treat.
Can I make these cookies gluten-free?
Absolutely! To create gluten-free sand dollar cookies, simply substitute regular all-purpose flour with a 1:1 gluten-free flour blend. Many brands offer excellent alternatives that won’t sacrifice taste or texture. Just keep in mind that some gluten-free flours may require slightly different hydration or additional binding agents, like xanthan gum, to achieve that perfect consistency.
How should I store sand dollar cookies?
To keep your sand dollar cookies fresh, store them in an airtight container at room temperature for up to one week. If you live in a humid climate, consider placing a small piece of bread in the container to help maintain their softness. For longer storage, they can also be kept in the fridge, though this may alter their texture slightly, making them a bit firmer.
Can I freeze the dough?
Yes! Freezing the dough for your sand dollar cookies is a great way to prepare ahead of time. After mixing the dough, shape it into discs, wrap each one tightly in plastic wrap, and then place them in a freezer-safe bag. They can be stored for up to three months. When you’re ready to bake, simply thaw the discs in the refrigerator overnight and bake them fresh for that just-out-of-the-oven taste!
Conclusion on Sand Dollar Cookies: An Easy Classic Recipe
In wrapping up our delightful journey into the world of sand dollar cookies, it’s clear these treats are a go-to for both novice and seasoned bakers. Their simple ingredients—flour, sugar, butter, and a touch of vanilla—combine to create a heavenly result that brings a taste of nostalgia to every bite. As you gather your loved ones to share these cookies, remember the joy that baking brings. Whether for a family picnic or a cozy evening on the couch, sand dollar cookies are sure to become a staple in your dessert repertoire. Happy baking!
Print
Sand Dollar Cookies
- Total Time: 27 minutes
- Yield: 24 cookies 1x
- Diet: Vegetarian
Description
Delicious sand dollar cookies that are light and perfect for any occasion.
Ingredients
Scale
- 1 cup (2 sticks) unsalted butter, softened
- 2/3 cup granulated sugar
- 1 teaspoon vanilla extract
- 1/4 teaspoon salt
- 2 1/2 cups all-purpose flour
- 1 large egg white, lightly beaten
- 1/2 cup finely chopped pecans or almonds
- Granulated sugar, for sprinkling (optional)
Instructions
- In a large bowl, beat the softened butter and sugar together with a mixer until light and fluffy, about 2-3 minutes.
- Beat in the vanilla extract and salt.
- Gradually add the flour, mixing on low speed just until the dough comes together. Be careful not to overmix.
- Preheat your oven to 350°F (175°C). Line two baking sheets with parchment paper.
- Take about 1 tablespoon of dough and roll it into a smooth ball.
- Place the ball on the prepared baking sheet. Using the bottom of a glass or a flat measuring cup, gently flatten the ball into a disc about 1/3-inch thick.
- Using the tines of a fork, press lines into the cookie to create a ‘sand dollar’ design. Make five lines from the center outward, like spokes on a wheel, and then a circle around the edge to define the shape.
- Repeat with the remaining dough, spacing cookies about 1 inch apart.
- Lightly brush the top of each cookie with the beaten egg white.
- Sprinkle the center of each cookie with the chopped nuts, gently pressing them in so they adhere.
- For extra sparkle, you can sprinkle a little granulated sugar over the cookies.
- Bake for 10-12 minutes, or until the edges are just starting to turn a very light golden brown.
- Allow the cookies to cool on the baking sheet for 5 minutes before transferring them to a wire rack to cool completely.
Notes
- These cookies can be stored in an airtight container for up to a week.
- Feel free to substitute the nuts with your favorite toppings.
- Prep Time: 15 minutes
- Cook Time: 12 minutes
- Category: Desserts
- Method: Baking
- Cuisine: American
Nutrition
- Serving Size: 1 cookie
- Calories: 100
- Sugar: 5g
- Sodium: 50mg
- Fat: 6g
- Saturated Fat: 4g
- Unsaturated Fat: 2g
- Trans Fat: 0g
- Carbohydrates: 10g
- Fiber: 1g
- Protein: 1g
- Cholesterol: 15mg